Posts

Showing posts from 2020

Easy Edge Banding For Plywood

Image
Edge banding can be done in a variety of ways.  You can buy thin veneers that can be applied to the plywood either with contact cement or by using the banding tape that comes with an iron-on adhesive.  While this is the most commonly used option, it is by no means durable and can actually limit your design options. Here is an easy technique demonstrated that will help you go ahead with plywood edge banding . Step 1: Cutting The Banding To cut the banding, you'll need to use a table saw. A band saw with a fence can also be utilized.  The thickness of your banding will depend on your design, but it should be at least 1/8 of an inch thick. Set the fence of the saw to the desired dimension.  While cutting thin parts in this fashion can increase the danger in using the saw, this will allow you to get uniform cuts every time, especially if you need a lot of banding.  Depending on the design of the saw, you may need to remove the blade guard.  Step 2: Applying The Banding To apply the edg
The Process Of Edge Banding Of Furniture Parts With PVC Edges

Image
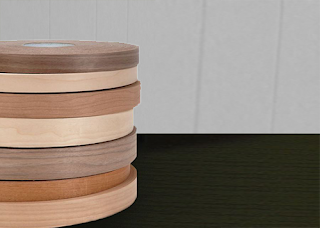
  The process of edgebanding furniture parts made of laminated chipboard is an integral part of the production process of manufacturing cabinet furniture. The presence of different, both in appearance and in the composition of the edging material on cabinet furniture is due to the need for facing, not mating ends of parts. The edging material is often called decorative edging, indeed, thanks to the edging operation, the product gets a finished look and looks neat, and with a competent approach to the selection of materials, it looks "expensive". But aesthetics is just one of the reasons for the need for edge banding on parts. Therefore, applying the required amount of edging to the ends of furniture parts is not a waste, but a sign of a professional attitude towards your work and a manifestation of respect for your customers. The process of edge banding of the ends of furniture parts made of laminated chipboard consists of several sequential operations, in particular: applyi

Do You Want To Know Various Kinds Of Wood Veneer And Their Properties? Read It!

Image
Wood veneer is a thinly sliced wood. This is mainly needed for interior design. Depending on the production method, the veneer is called - peeled (made on special peeling machines), sawn veneer, and sliced veneer. JSO Wood Products Peeled veneer- (thickness 0.1 - 10 mm) is the most common, cheapest and most affordable type of veneer for consumers. It is made on shelling machines. For the production of peeled veneers, mainly wood species such as alder, birch, pine, and oak are used. The technology of its manufacture is simple - short logs are rounded - churaks are cut in a spiral, forming thin chips - veneer, of a given thickness. Sawn veneer- (thickness from 1 to 10 mm), made on plywood saws or horizontal saw frames. It is made from coniferous wood: fir, cedar, spruce. This Raw Wood Veneer is of especially high quality and can be used, in particular, for the production of deck violins and other stringed musical instruments. Sawn veneer is a rather expensive material, si

Tips To Know For Vacuum Veneering

Image
No matter how many times you've used a vacuum press for burl wood veneer , there's always a moment of slight anxiety when you pull a veneered panel out of the press. You're wondering if there will be bubbles, ripples, delamination, or seam separation. Here are a few tips to ease the worry and avoid the most common mistakes when working with veneer. 1.    Choose the right glue Contact cement is only suitable for paper backed and 2 ply veneers. It's a common beginner mistake to use contact cement or yellow wood glue on raw wood veneers. Neither of these adhesives dries hard and yellow glue has a tendency to bleed-through.  Contact cement  is only suitable for  paper backed  and 2 ply veneers. Wood veneer with no backing should never be used with contact cement. 2.    Use a glue roller Always apply glue to the substrate material and not to the veneer. The easiest way to apply most water-based veneer adhesives on melamine edge banding is with a  simple foa

Benefit And Advantages Of Exotic Burl Wood Veneer

Image
Introduction Hardwood can be expensive and difficult to bring sustainability. It makes sense to utilize your burl wood veneer as a part of your woodworking process. Through the use of veneer, you can get the expensive look and feel exotic hardwoods that are expensive and rare with the most economical prices while leaving the rest of the world an opportunity to use it. Benefits and advantages of Exotic burl wood veneer Building your furniture common domestic lumber like oak or pine, it lets you work with quality solid wood in creating the beautiful furniture.   Burl wood veneer   is the best material to give finish touch to your costly wooden furniture and makes out standout with the figure of exotic woods and beautiful wood grain. Exotic burl wood veneer comes from places like Africa and South America where there are most exotic tree species for veneer but they need to conserve and all are not practical for solid wood building due to the properties of the wood. T

Technique to Do the Edge Banding On Any Furniture Piece

Image
Edge banding is an important task which you need to do if you are working on any furniture piece. Exposed plywood or other materials does not look very much good. Also the piece has to be perfectly finished which has to be done by the edge banding. Most common the hard wood edge banding and veneer edge banding is being done.                                                       Follow these steps But they are not at all hard to do. It is quite easy if you know the right technique to do the task. If you are not having the required hot machine, you can make use of the clothes iron too. Beside you will require an edge trimming tool which is must. Smaller iron will do great. Also you need to make use of glue which would help the edge to be pasted with the veneer sheets. Start with the side which is least visible and thus the pasting would not be visible at all. For a rectangular box, it is best to start form the back side of the box. Then it is the turn of the sides and